That hissing sound coming from your bathroom isn't just annoying—it's the sound of money literally going down the drain. Most of the time, the fix for a running toilet is surprisingly simple. You're likely looking at a worn-out flapper, a misadjusted float mechanism, or a faulty fill valve inside the tank.
The good news? These are quick fixes you can often tackle in under 30 minutes with no special tools.
The Hidden Cost of a Running Toilet
It's so easy to ignore that quiet, constant hiss. After a while, you might just tune it out, writing it off as a quirk of an older toilet. But that seemingly small problem is one of the most common—and expensive—sources of water waste in any home. What begins as a minor sound can quickly become a major shock on your next water bill.
I've seen it happen countless times. A family notices their toilet runs on and off but keeps putting off the repair. A couple of months go by, and their water bill suddenly doubles. They had no idea they were losing thousands of gallons of water, all from a tiny, silent leak inside the toilet tank. This isn't a rare story; it plays out in homes everywhere.
Understanding the Financial and Environmental Impact
The numbers behind a running toilet are genuinely staggering. A single leaky toilet can waste up to 200 gallons of water every single day. If you let that go for a year, you're looking at over 70,000 gallons of wasted water. That’s not just a hit to your wallet; it’s a serious strain on local water resources.
Fixing a running toilet goes beyond just silencing an irritating noise. It’s a smart move for any homeowner, with some very clear benefits:
- Lower Utility Bills: You’ll immediately cut down your monthly water use and save money.
- Water Conservation: You're doing your part to preserve a critical natural resource for your community.
- Preventative Maintenance: Catching this early can stop it from turning into a more complicated and expensive plumbing disaster down the road.
The truth is, a running toilet is a silent financial leak. Ignoring it is like leaving a tap running 24/7. Addressing it promptly is one of the easiest ways to cut down on unnecessary household expenses.
This guide will walk you through how to solve the problem yourself. Even though the impact is huge, the solution is often straightforward and cheap. You don’t need to be a pro plumber to figure this out.
However, if you've tried the common fixes and still have issues, it might be a sign of something more serious. Scheduling a professional plumbing inspection in Oxnard can give you peace of mind and catch any bigger problems before they get worse.
Your Essential Toolkit for Toilet Repair

Before you dive into fixing that running toilet, let's get your gear in order. The good news? You almost certainly don't need to buy a single new tool. Most of what you’ll need is probably already stashed in a junk drawer or under the kitchen sink.
Taking just a few minutes to gather everything you need before you start is the secret to a smooth, headache-free repair. It's the difference between a quick fix and a frustrating afternoon with multiple trips to the hardware store.
The Must-Have Items
Think of these as your core essentials. You'll be hard-pressed to get the job done without them, so make sure you have these on hand before you shut off the water.
-
Adjustable Pliers or Wrench: This is your go-to for loosening the nuts that connect the water supply line to the toilet tank. An adjustable one is perfect because you won't have to guess the size.
-
Sponge and Old Towels: Things are going to get a little wet. That's just part of the deal. Lay a towel or two on the floor to catch any drips, and have a big, absorbent sponge ready to soak up that last bit of water from the bottom of the tank. Trust me, it makes the whole process much cleaner.
-
Rubber Gloves: The water in the tank is fresh, but the inside can be a bit grimy with mineral deposits and sediment. A simple pair of rubber gloves will keep your hands clean and dry while you're working.
Pro Tip: Grab a small bucket or an old bowl before you start. It’s perfect for catching drips when you disconnect the water line and for holding wet, old parts so you don't make a mess on the bathroom floor.
Nice-to-Haves That Make Life Easier
You can definitely get by without these, but having them nearby will make the job quicker and more comfortable.
-
A Headlamp or Flashlight: It’s surprisingly dark inside a toilet tank. Trying to see a tiny clip or hook up a flapper chain can be a real pain. A headlamp is fantastic because it leaves both of your hands free to work.
-
Scissors or Wire Cutters: Often, a new flapper chain or refill tube will be longer than you need. A regular pair of scissors or some simple wire cutters are all you need to trim them to the perfect length.
Finding the Culprit: A Look Inside the Tank

Alright, time to play detective. The secret to any successful DIY fix is knowing exactly what you're up against. With a running toilet, all the clues are waiting for you right inside the tank. Honestly, this diagnostic part is the most critical step—get this right, and the actual repair is usually a breeze.
First things first, let's get a clear look. You need to shut off the water. Look for the small shut-off valve on the wall, usually behind or next to the toilet. Give that knob a gentle turn clockwise all the way until it stops. This cuts the water supply to the tank, giving you a quiet, controlled space to work.
With the water off, give the toilet one final flush. This will drain most of the water out of the tank. Now, carefully lift the heavy ceramic lid off and set it down somewhere safe and flat where it won't get knocked over. Trust me, those lids are fragile and a pain to replace.
Identifying the Key Players
When you peer inside the tank, you'll see a few main components. Don't get bogged down by technical jargon; just focus on what each part does. Think of it as a small team where each member has a very specific job.
- The Fill Valve: This is the tall, tower-like mechanism, typically on the left side. Its only job is to refill the tank after a flush.
- The Flapper: See that rubber or plastic disc at the bottom center of the tank? That's the flapper. It lifts to let water rush into the bowl when you flush, then drops to seal the hole.
- The Float: This little guy tells the fill valve when to stop filling. It might be a classic ball on a metal arm or a cup that rides up and down the fill valve's tower.
From my experience, the vast majority of running toilets are caused by a stuck flapper, a worn-out fill valve, or an improperly set float. The good news is that fixing these issues rarely requires more than a few basic tools and a cheap part, but it can make a huge difference in your water bill. You can find more professional insights about how much water a leaky toilet wastes from people who deal with this every day.
The Foolproof Food Coloring Test
If you think you have a slow, sneaky leak, there’s an old-school trick that works every time. It's the perfect way to nail down a bad flapper, which is hands-down the most common culprit.
Head to the kitchen and grab some food coloring—a dark color like blue or red works best. Squeeze about 10-15 drops directly into the tank water.
Pro Tip: Whatever you do, do not flush after adding the dye. The whole point is to see if that colored water can seep past the flapper on its own.
Now, just walk away. Set a timer for 20 minutes or so. When you come back, take a peek inside the toilet bowl (not the tank). If you see even a hint of color in the bowl water, you've found your problem: the flapper isn't sealing properly and needs to be replaced.
If the water in the bowl is still perfectly clear, your flapper is probably fine. The issue is more likely with the fill valve or the float being set too high. This simple test takes all the guesswork out of the equation.
Hands-On Fixes for the Most Common Culprits
Alright, you've done the detective work and have your tools ready. Now it's time to get your hands dirty and fix that pesky running toilet. We'll go through the most common repairs one by one, with some real-world advice to get it done right the first time.
Don't put this off. A single running toilet can waste up to 216 liters (57 gallons) per hour—that's a shocking amount of water and money literally going down the drain. You can see why this is a fix you want to tackle immediately.
Fixing a Worn or Leaky Flapper
If the food coloring test confirmed a leak, the flapper is almost always the villain. This little rubber seal is the gatekeeper between the tank and the bowl, but it gets brittle and warped over time, failing to create a solid seal. The good news? Swapping it out is one of the most satisfyingly simple DIY toilet repairs you can do.
First things first, shut off the water supply and flush the toilet to drain the tank. You'll see the old flapper is usually connected by two little "ears" that clip onto pegs at the base of the overflow tube. Just unhook those and detach the chain from the flush lever arm.
Here’s a pro tip that’ll save you a second trip to the hardware store: take the old flapper with you. Toilets aren't one-size-fits-all, and neither are their parts. Matching the exact size and style—whether it's a simple rubber disc or a more complex rigid frame—is the key to a perfect seal.
Once you have the new one:
- Clip the new flapper's ears onto the same pegs.
- Hook the new chain onto the flush lever arm.
- Make sure there's about a half-inch of slack in the chain. Too tight, and the flapper won’t close properly. Too loose, and the chain can get snagged underneath, causing the very leak you're trying to fix.
This whole process follows a pretty standard flow, as you can see below. It's a great visual to keep in mind for most of these simple adjustments.
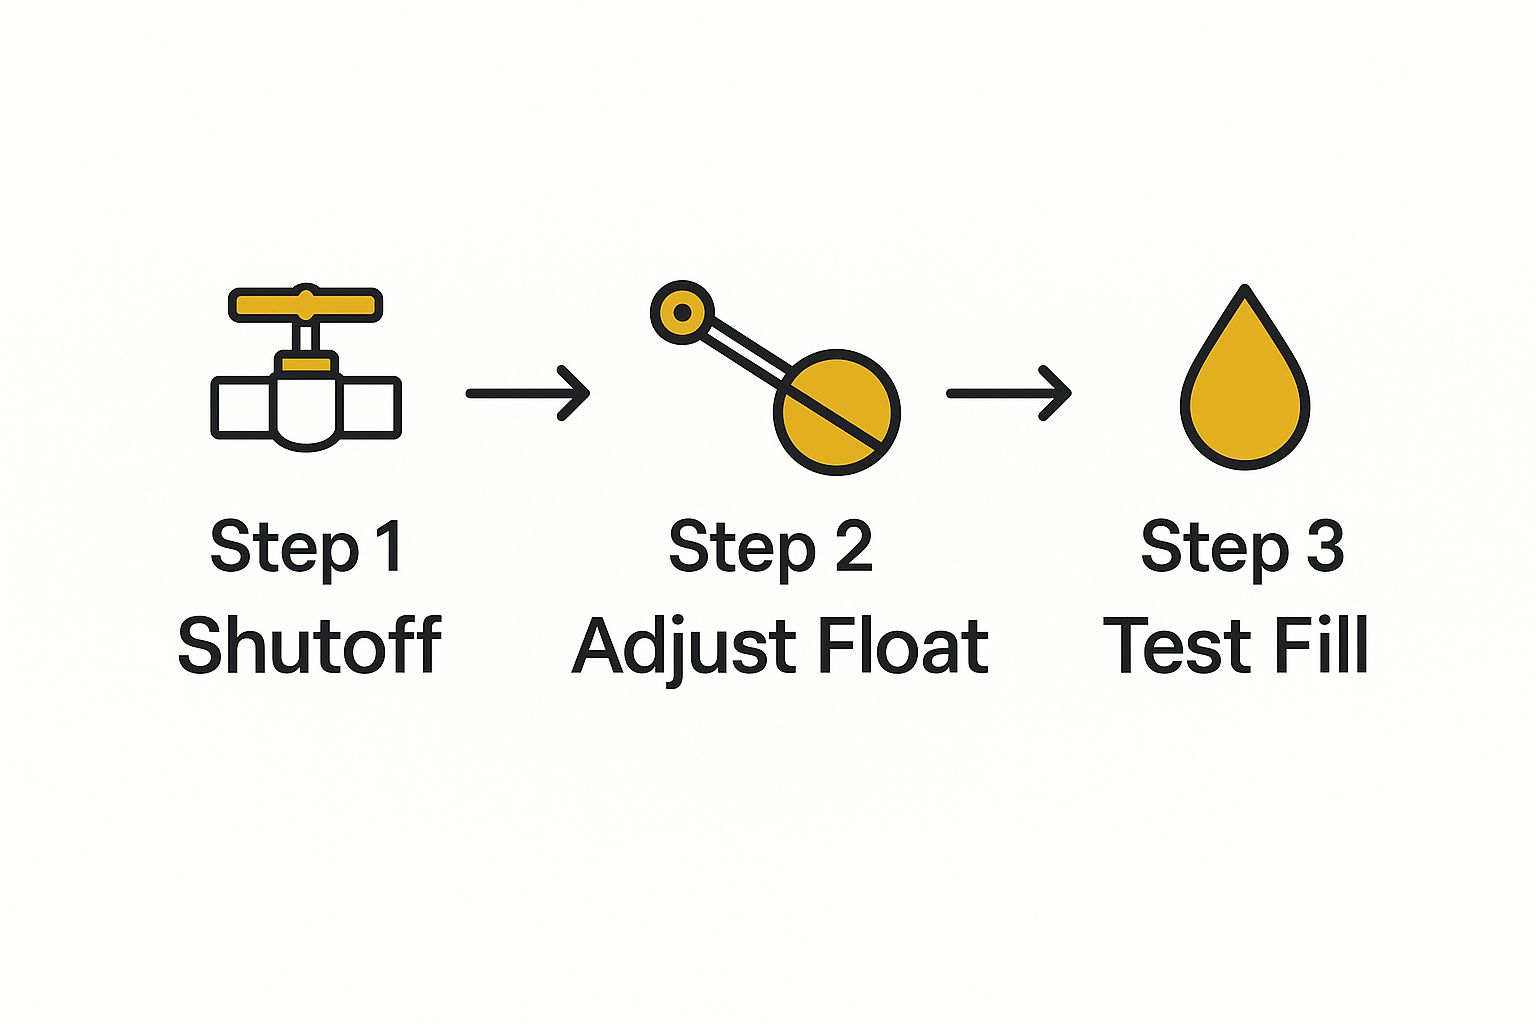
From turning off the water to making the fix and testing your work, the steps are pretty universal for these kinds of repairs.
Adjusting the Float Height
Is the water in your tank constantly spilling into the overflow tube? That's a classic sign your float is set too high. The float’s job is to tell the fill valve, "Okay, that's enough water," but when it's out of whack, the tank just keeps filling. Luckily, this is usually a quick, tool-free fix.
Take a look inside your tank. You'll probably find one of two types of floats:
- Ball Float: This is the old-school design with a big ball on a metal arm. To lower the water level, all you have to do is gently bend that arm downward. It doesn't take much force, and a small adjustment can make a huge difference.
- Column Float: Most newer toilets have a float cup that slides up and down the main fill valve shaft. Look for a small adjustment screw on top or a clip you can pinch on the side. A few turns of the screw or a quick slide of the clip will let you lower the float's resting position.
Your target is to get the water level to stop about one inch below the top of the overflow tube. This ensures you have plenty of water for a strong flush without wasting any.
After you make an adjustment, turn the water back on and let the tank fill up. Watch closely to see where it stops. It might take a couple of tries to dial it in perfectly. If you find yourself dealing with issues more complicated than these simple tweaks, exploring a professional toilet repair and installation service can give you a reliable, long-term solution.
Fine-Tuning the Fill Valve
Sometimes the running sound isn't a gush, but a faint, constant hiss. This often points to a fill valve that can't quite shut off completely. Before you assume you need to replace the whole unit, a quick cleaning can often work wonders.
Again, turn off the water and flush to empty the tank. Now, let's get that fill valve cap off. On most modern valves, you can do this by pushing down on the cap and giving it a quarter-turn counter-clockwise. It should pop right off.
Underneath, you'll find a small rubber seal or diaphragm. This is a magnet for sediment and mineral gunk, which is often what's preventing the valve from closing all the way. Carefully pull that seal out, rinse it under the sink to remove any debris, and give it a quick inspection for cracks or warping. If it looks worn out, these seals are inexpensive and easy to find at any hardware store.
Before putting it all back together, cup your hand over the open valve and turn the water on for just a second. This quick blast will flush out any lingering crud from inside the valve itself. Pop the seal and cap back on, turn on the water, and listen. More often than not, that simple cleaning is all it takes to finally get some peace and quiet.
If you hit a snag during your repair, don't worry. This quick guide can help you figure out what to do next.
Troubleshooting Common Toilet Repair Issues
| If You See This… | Try This First… | If That Doesn't Work… |
|---|---|---|
| The toilet flushes on its own ("ghost flushing"). | The flapper is almost certainly leaking. Double-check that it’s seated correctly and the chain isn’t snagged. | Replace the flapper. Even a tiny, invisible warp can let water seep through over time. |
| The new flapper isn’t sealing properly. | Check that you bought the right size and type for your toilet model. A universal flapper doesn't always work. | Ensure the rim of the flush valve (where the flapper sits) is clean and smooth. Mineral buildup can prevent a good seal. |
| Water still runs after adjusting the float. | Re-check the water level. It might still be a fraction too high. Make another small adjustment. | Inspect the fill valve for debris. A small piece of sediment might be stuck, preventing it from closing fully. |
| The toilet makes a loud "thump" when it stops filling. | This is often water hammer. Try turning down the shut-off valve slightly to reduce the water pressure. | You may need to install a water hammer arrestor on the supply line, which is a more involved plumbing task. |
Getting stuck is part of any DIY project. The key is to work through the problem logically, and you'll get that toilet running perfectly in no time.
When to Call a Professional Plumber
There's a real sense of pride in fixing something yourself. Most of the time, a running toilet is a straightforward fix you can knock out on a Saturday morning. But knowing when to put the wrench down is just as crucial as knowing how to use it.
What looks like a simple toilet leak can sometimes be the tip of the iceberg—a sign of a much deeper plumbing issue that a new flapper just won't solve. Pushing forward when you're in over your head can turn a small nuisance into a costly disaster. Water damage is no joke. Knowing when to wave the white flag and call a pro is the smartest move you can make.
Red Flags That Demand a Professional
So, you've tried all the common fixes. You replaced the flapper and even fiddled with the float, but that phantom running sound just won't quit. When the obvious solutions don't work, it’s a clear sign that something more serious is going on.
Keep an eye out for these tell-tale signs that it's time to call in an expert:
- The Leak Keeps Coming Back: You put in a new flapper or fill valve, and everything seems fine. A week later, you hear it running again. This often points to a worn-out flush valve seat or an improperly sized part that just isn't sealing right.
- You Spot Cracks in the Porcelain: Even a tiny, hairline crack in the tank or bowl is a major problem waiting to happen. That crack can fail without warning, unleashing a flood of water. Don't risk it.
- Water Is Pooling at the Base: See a puddle of water around the bottom of the toilet? That's almost always a failed wax ring. Replacing it involves lifting the entire toilet, which is a heavy, messy job best left to someone who does it for a living.
- Multiple Drains Are Acting Up: If your toilet is gurgling and your shower is draining slowly, the problem isn't your toilet. It's a sign of a blockage deep in your main sewer line, a job that requires professional equipment.
Expert Tip: If you hear a gurgling sound from your shower drain right after you flush, stop what you're doing. That’s a classic sign of a main drain problem, and trying to fix it yourself could make things a lot worse.
When the Problem Is Bigger Than the Toilet
Sometimes, the root cause isn't even in the bathroom. If your home's water pressure is too high, it puts constant stress on your plumbing fixtures. This can cause fill valves to wear out and fail long before their time.
A professional plumber has the tools to check your home's water pressure and can install a pressure-reducing valve to protect your entire system.
If a repair feels out of your league or the problem just won't go away, don't hesitate. Getting a pro involved early is always the right call. For tricky diagnostics and a repair that lasts, finding the best plumber in Ventura County will save you from future headaches and potential water damage.
A Few Common Questions About Toilet Repairs
Even with the best guide, a few questions always seem to pop up in the middle of a DIY project. Here are some straight answers to the things people ask most when they're trying to fix a running toilet. Nailing these details will help you get the job done right the first time.
How Often Should I Replace the Parts Inside My Toilet Tank?
This is a great question. While there isn't a hard-and-fast rule, getting into the habit of giving your toilet a quick annual inspection is a smart move. Think of it as a yearly checkup.
The soft, flexible parts are always the first to wear out.
- The Flapper: This little rubber seal is the workhorse of your toilet, and it lives underwater. You should plan on replacing it every 3-5 years. If you have hard water, it can get brittle and fail even sooner.
- The Fill Valve: These are built tougher and can easily last over five years. The telltale signs of failure are when your tank refills incredibly slowly or you hear a constant hissing sound long after the flush.
My best advice is to be proactive. If you open the tank and the flapper feels stiff or the fill valve looks corroded, just replace it. A few bucks now is way better than dealing with a big leak later.
A proactive approach to toilet maintenance is always cheaper than a reactive one. A $10 part replaced early can prevent hundreds of dollars in wasted water over the next year.
Can I Use a Universal Toilet Repair Kit?
In most cases, absolutely. Universal kits are a fantastic and affordable choice for the vast majority of standard, single-flush toilets. They pack all the common failure points—like the flapper and fill valve—into one easy-to-buy package.
But, "universal" doesn't always mean a perfect fit for every single toilet.
- Specialty Toilets: If you have a high-efficiency, dual-flush, or a quirky older toilet, you'll likely need manufacturer-specific parts to get it working properly.
- Confirm the Fit: Before you head to the store, lift the tank lid and look for your toilet's make and model. It's usually stamped into the porcelain. A quick online search with that info will tell you if a universal kit is compatible.
Here's a simple trick I always recommend: snap a quick photo of the inside of your tank with your phone. When you get to the hardware store, you can show an employee exactly what you're working with. It’s a foolproof way to make sure you walk out with the right parts.
Why Does My Toilet Run for Just a Few Seconds Randomly?
Ah, the "phantom flush." It’s one of the most common and frustrating toilet problems. This is almost always caused by a very slow, silent leak from the tank into the bowl.
The prime suspect is a worn-out flapper that isn't sealing completely anymore. Over time, maybe minutes or even hours, enough water seeps out that the tank's water level drops just low enough to trigger the fill valve. The valve then kicks on for a second or two to top it off, and that's the sound you hear.
The food coloring test we covered earlier is the perfect way to diagnose this. If you see even a hint of color in the bowl after 20 minutes, you’ve found your phantom.
If you've tried these fixes and your toilet is still giving you trouble, don't let a stubborn leak drain your wallet. The expert technicians at Armor Hydro Jetting can diagnose and solve the problem quickly and professionally. Visit us online to schedule your service today.